MORE IN THIS SERIES:
• PART I: THERE'S NEVER AN END TO THE LEARNING PROCESS
• PART II: AVALANCHE TERRAIN
• PART III: AVALANCHE BURIALS AND SEARCHING TIPS
Exum guides dig a pit most every day they’re in the field. They complement the avalanche forecast and the guide’s understanding of the entire season’s snowpack.
“One pit will not give you enough info to asses snow stability,” says Patridge. “It’s a season’s worth of pits that gives you confidence.” And, as Patridge says, “it takes a decade to discern what you’re perceiving.”
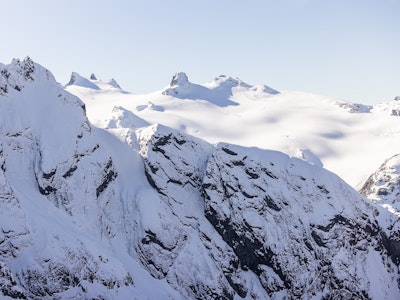
First, you’ll need to know what snow grains cause avalanches. The only way you’ll learn is by digging a lot of pits. He suggests visiting the site of a recent avalanche. “Dig a meter back from the crown and examine the layers,” says Patridge. “Try to find the weak layer that failed.”
To dig effective pits, you’ll need good tools—a shovel with a broad, ridgeless scoop (to produce smooth walls) and a saw that attaches to your shovel handle or your pole.
It’s true that you need to dig your pit in a similar area to the slope you intend to ski, but if you incorporate the Extended Column Test, you can gather relevant data on lower angle (safer) slopes adjacent to your skin tract.
Patridge emphasizes making your pits consistent and repeatable—excavate perfectly and precisely every time. “Any deviation in dimensions alters your testing results,” says Patridge. “If the front wall is irregular, overhanging or less than vertical, your results won’t be relevant to yesterday’s.”
2. Dig a pit wall 100cm wide and 80-120cm deep, depending on the weak layer depth.
3. Make the front and side walls clean and perfectly vertical.
4. Examine the layers and the snow crystals on the side wall, taking note of the location of the weakest layer.
5. Perform an improvised Shovel Shear test on the far right or left of the front wall of the pit by cutting a 30 x 30 cm column with no back cut. Insert the shovel blade to the depth of the weakest layer and pull the shovel in line with the slope angle. This modified test is intended to allow an observation of the snow strength while excavating a chimney from where the following tests will be performed.
6. Clean up the side wall of the chimney and isolate another 30 x 30 cm column with a back cut. Place your shovel blade on the snow surface and perform a compression tap test. Hit the blade with 10 taps from the wrist, then the elbow and finally from the shoulder. Note if failure occurs in the column and from where. Perform one more compression tap test adjacent to the previous one. Now clean up the front wall again to prepare for the extended column test.
7. Using either two probes or an extended saw, isolate a 30 x 90 cm column oriented across slope. Back cut the column below the weakest layer that has been reacting during the previous tests. Tap like you did during the compression tap test on either the far right or left of the 30 x 90 column. Observe if you have fracture initiation and then subsequent propagation across the block.
Professional guides always have a backup plan or backup route in case one is needed. To maximize the day, you should too. As Patridge says, “Life is short—days off are sometimes hard to come by. If you have a backup plan you can take advantage of your time in the mountains.” The following should be considered warning signs not necessarily to turn around, but at least to make a more conservative choice.
1. Signs of instability such as cracking and/or collapsing.
2. Avalanches.
3. Your partner is nervous, hesitant or uncertain.
4. Change in temperature. More specifically, a rapid warm-up that results in above freezing temperatures.
5. Rain
6. High snowfall rate that lasts for more than two hours.
7. Strong winds that result in wind loading.
8. Fatigue.
9. Gear problems.
10. Intended descent route is in poor condition.
• PART I: THERE'S NEVER AN END TO THE LEARNING PROCESS
• PART II: AVALANCHE TERRAIN
• PART III: AVALANCHE BURIALS AND SEARCHING TIPS