Bindings are like the “middle child” of ski gear: They grow and evolve just like their hardgoods siblings (skis and boots) yet they’re often an afterthought when it comes time to revamp a ski setup. Over the last few years, however, we’ve seen huge advancements in the category and today’s bindings are certainly worth your attention. So let’s spend some time trying to understand them better.
We’ve tapped Marker athlete and Kiwi freeskiing legend, Sam Smoothy, as our resident expert on the new breed of hybrid bindings that bridge the gap between traditional alpine and tech offerings. Spending much of his season crushing big-mountain descents, Smoothy recognizes the necessity of a safe, sturdy set of binders and currently skis on the all-new Marker Duke PT. Additionally, we’ll break down a handful of important technical features.

Hybrid bindings have bridged a large gap in the market [between frame and tech bindings]. A frame binding creates this big dead spot in your ski’s flex under its rails. The Duke PT is designed for skiers who ski alpine most of the time, want the benefits of that alpine binding and the confidence that comes with it while descending. Tech bindings are a bit too minimal for some people and the skiing they’re trying to accomplish.
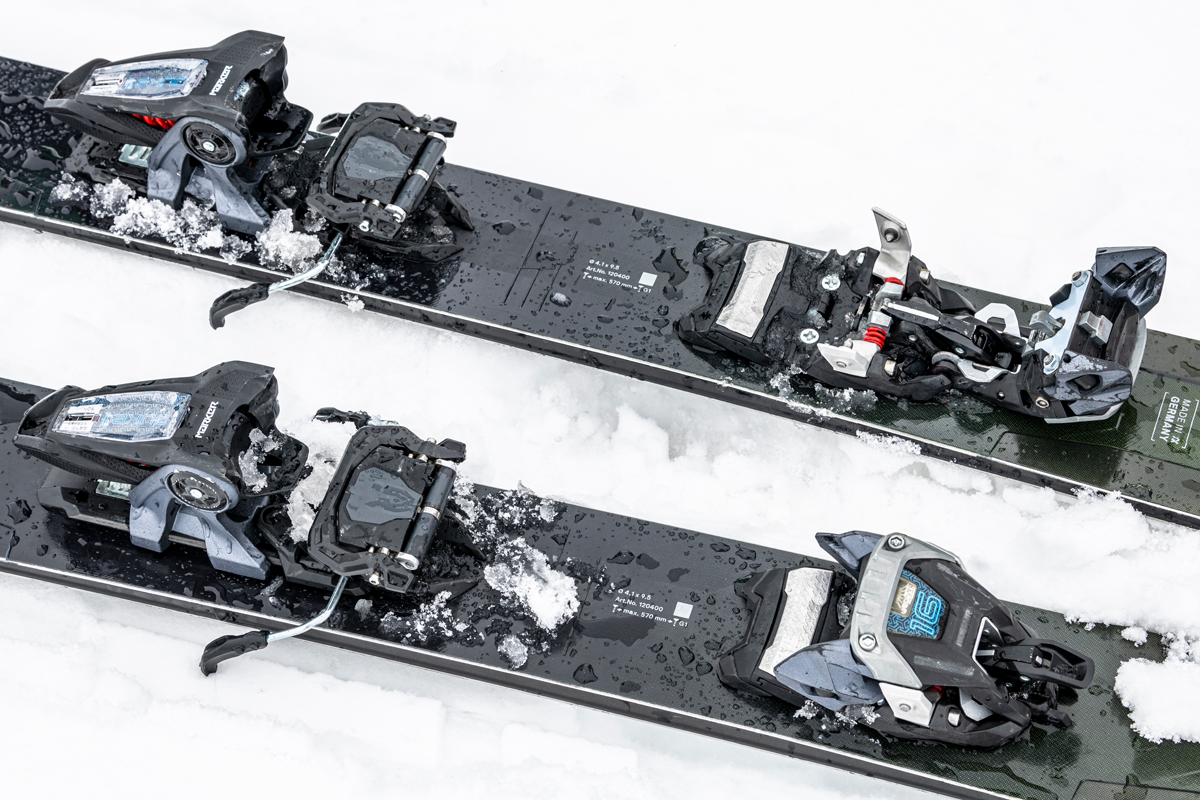
Compared to a tech binding where the release value is set at the heel only, hybrid bindings like the Duke PT have a fully DIN-adjustable toe that looks just like an alpine toe. It’s really easy to use. You just chuck the damn thing on and it has that reliable feel of a Marker binding—it clunks on and you know you’re in there really solidly. There’s no question of “Is my toe piece on?” at the top of each run.
You’re going to have better power transmission with a solid-built binding because it really eliminates any kind of torsional movement. When you’re in chundery snow or, really, any snow at high speed, there’s a huge amount of force with each turn and you need to be able to lean into the ski confidently. That’s something the Duke PT really excels at and is especially critical when you ride really wide skis.
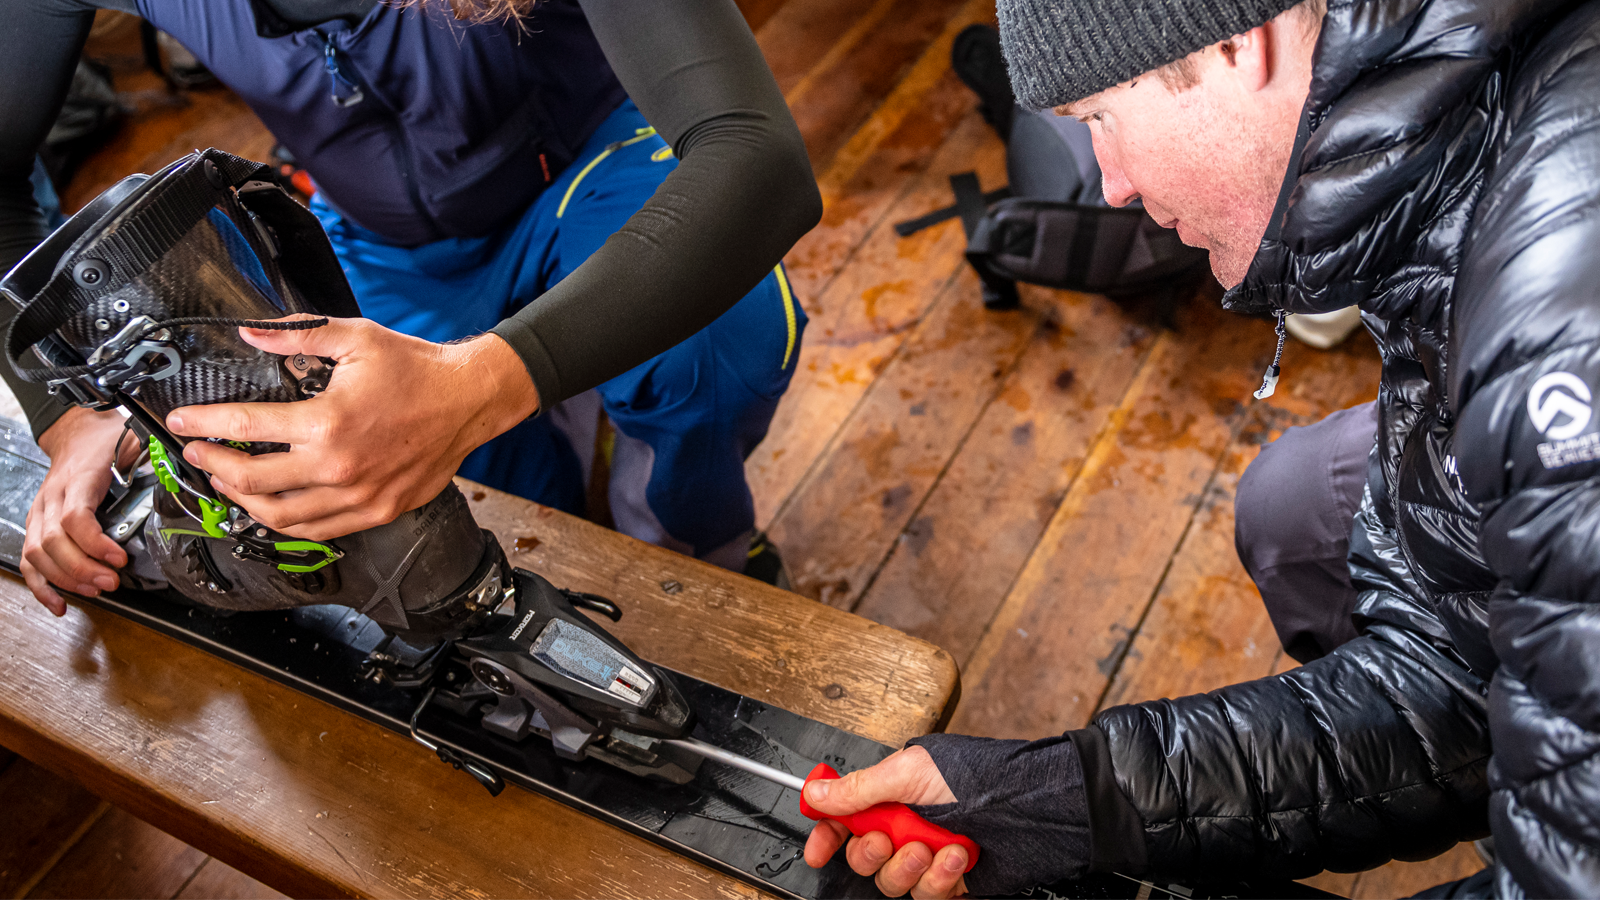
Stand on the ski’s recommended mounting line to see how it looks and feels before mounting anything. Some skis, I’m just bang-on recommended—like with Völkl’s BMT backcountry skis. But don’t just assume the recommended line is perfect for you. You want to think about how closely it mirrors what you like doing on skis. I also think it’s always smart just to check that line: There’s a chance that topsheet could be placed just slightly off, even a half-centimeter. It’s good to double-check before mounting.
PRO TIP: Here in New Zealand, we’re driving on a lot of dusty roads and that gums up your bindings. Damage to your bindings can happen without even skiing on them—and they are your main point of safety. You’ll be operating as if they’re at full capacity, but they might not be; if you don’t check, you aren’t going to know.
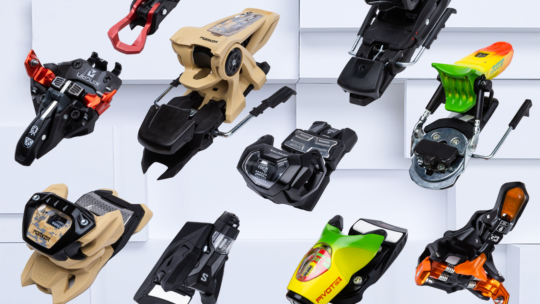
Binding Types
There are four primary categories of bindings to consider. The first, and most common, is a standard alpine binding. These are used for lift-serviced skiing and don’t feature any ski-touring capabilities. Next are frame bindings. These are considered the entry-level option in the ski-touring market because they accommodate alpine soles and don’t require tech inserts in the toe of your boot. The upside is that they make the backcountry more accessible for some skiers while the downside is that the pivot point on the toe is less efficient and the two rails connecting the toe and heel make them bulkier.
On the opposite end of the spectrum from frame bindings are tech bindings. These are the lightest, most minimal bindings—utilizing small pins to hold the toe and heel of your boot in place. When traveling uphill, the heel pins are disengaged, leaving just your toes connected for easy striding. Finally, the newest binding category is the hybrid variety. These bindings, such as the Duke PT and Salomon Shift, combine an alpine heel piece with a hybrid tech and alpine toe piece. This allows you to tour uphill with the pins while benefiting from the downhill performance and power transmission of an alpine toe.
Boot and Binding Compatability
With the advent of new boot soles and binding types, it’s extremely important to make sure that your equipment can work safely in tandem. Take a look at this chart to understand which boot soles and bindings work together.
DIN
The DIN value, or Deutsch Industrie Norm is a value that correlates with how much force is required to eject your toe or heel in the event of a crash. It’s based on a skier’s height, weight and skiing ability and should always be set by a qualified technician. A binding’s highest DIN value is typically included in its name. The Duke PT 16, for example, tightens up to 16.
Forward Pressure
When the time comes for your boot to properly release from your binding during a crash, your forward pressure is usually the most influential factor, along with your DIN setting. With the proper forward pressure—adjusted in the heel piece—your boot will exit the binding from the toe or heel, to either the left or right, rather than exploding upward and causing injury.
Elasticity
While bindings may appear to be completely stagnant, they actually allow a small amount of movement to accommodate the constant forces coming from every direction—similar to the suspension on a bike or car, but more subtle. This movement is called elasticity. When external forces are more than a binding’s elasticity permits, the when the binding releases your boots.
Anti-Friction Device (AFD)
An AFD is the smooth pad underneath the toe in an alpine or hyrbid binding. The smooth surface allows your boot to be re-centered by the elasticity in the binding or smoothly released when enough force is applied.
Power Transmission
Power Transmission is a subjective attribute of bindings. When we think about the basic fundamentals of good skiing, it’s often explained as flexing the front of the boot and sending energy down into your ski for a strong turn. Naturally, the binding is an essential piece of that equation and a properly adjusted binding with a wide mounting pattern will provide the best transmission of power.
Mounting Considerations
A binding’s mounting position on a ski is typically based on a manufacturer’s recommendation, displayed via a small line on each ski where the binding should be placed. Yet, like all gear decisions, mounting location can be tweaked based on your skiing style and the type of snow and terrain on which you intend to spend your time. Progressive, freestyle-focused skiers should move toward the center of the ski to allow more room in the tail for landings and easier switch skiing, while purists should mount slightly closer to the tails.
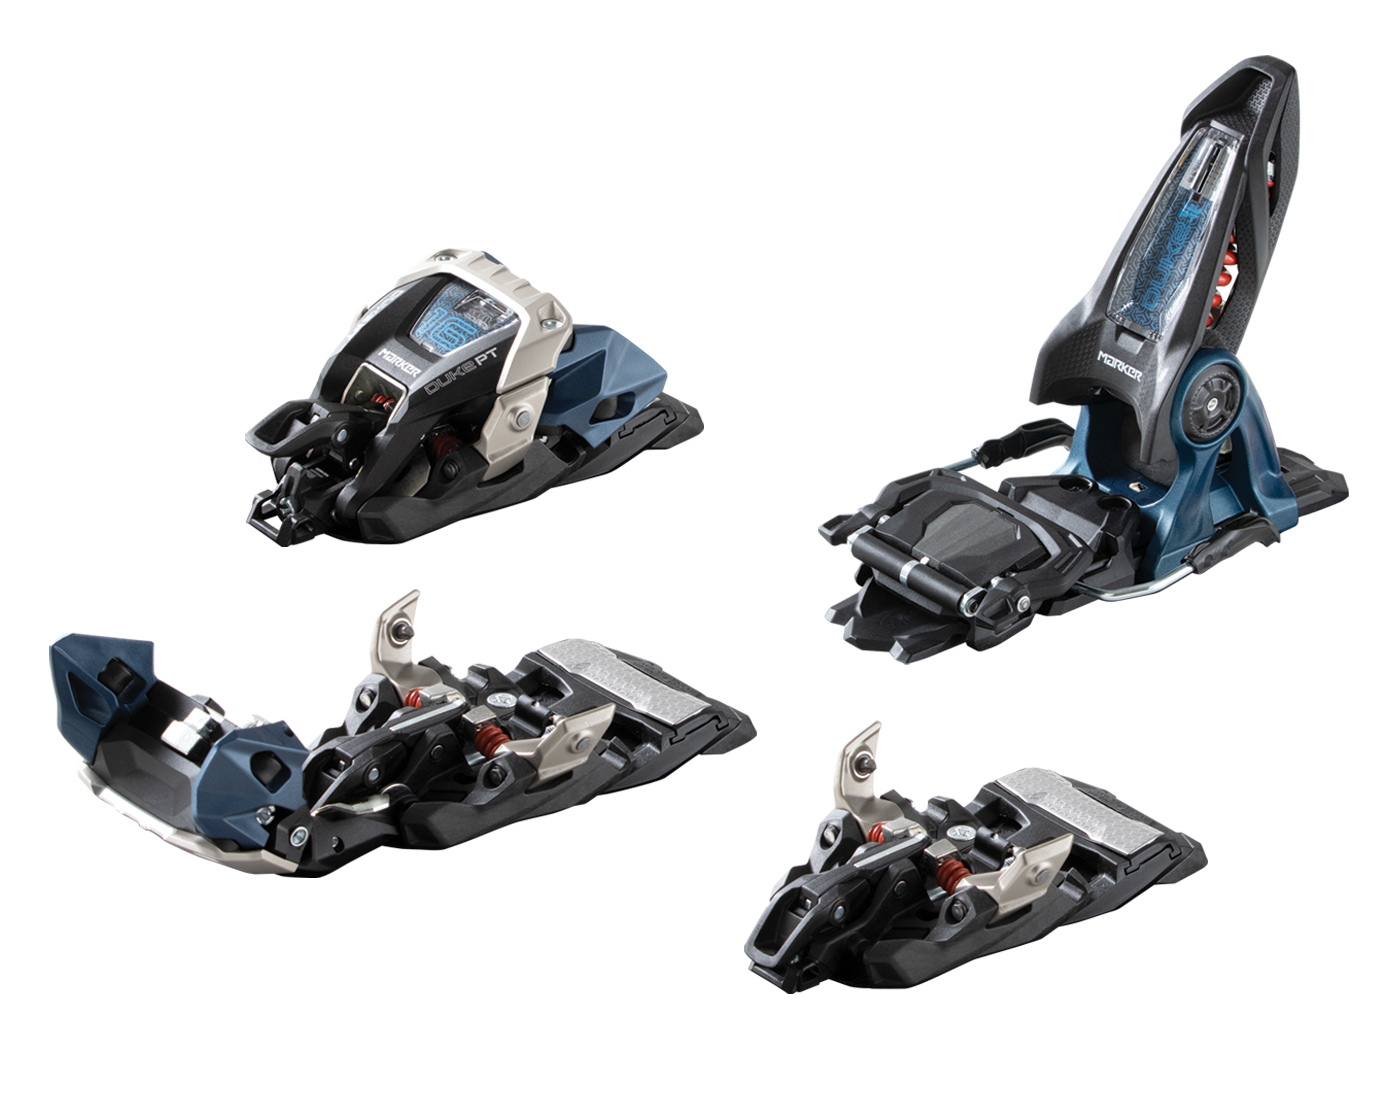
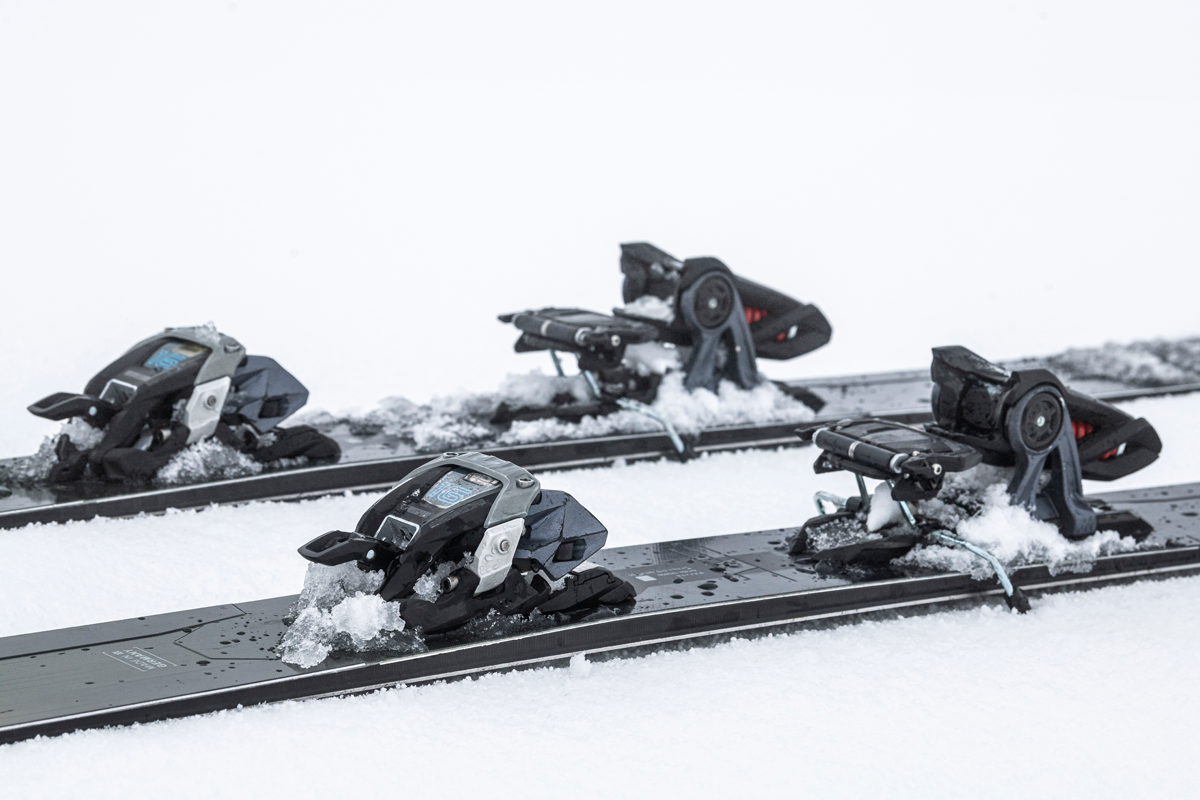
Marker Duke PT 16
As skiers across the globe continue to explore the backcountry, there’s a growing need for bindings that offer the best of both worlds: proficient, easy-to-use tech for the uphill with impressive performance on the downhill. For years, Marker has been working toward satisfying this massive consumer need and, this season, it’s coming out swinging with the Duke PT. In alpine (downhill) mode, the binding boasts every quality you’d expect from a Marker product; a healthy 6-16 DIN range, solid alpine heel piece and a toe piece that safely wraps around the front of your boot. This ensures the sendiest of skiers can really crank ‘em down but expect to release safely should anything go south.
However, the real innovation here is centered in the Transformer-like toe piece. To switch the binding from ski mode to walk mode, just unlock the upper part of the toe piece, rotating it forward, toward the ski tip. Underneath—voila!—you’ll find tech pins for your touring boots. At this point you can choose to leave the 300-gram toe piece attached to the baseplate or remove the upper portion and stow it in your pack to save weight on each step. When it comes time to re-attach, Marker’s Auto Quad Lock ensures the binding stays in place thanks to four different locking points. Like we said, the best of both worlds.